Using Novi's MCP
Last updated: November 6, 2026
How to connect Novi's MCP to an AI tool such as Claude, ChatGPT, Gemini, and Copilot Studio.
Novi Connect lets you securely link your association's Novi AMS data to AI tools such as Anthropic's Claude, OpenAI's ChatGPT, Google's Gemini, and Microsoft's Copilot Studio so you can ask natural-language questions about your members, events, and more.
While we are working to get our MCP added to Anthropic and OpenAI marketplaces, you can still add the MCP manually.
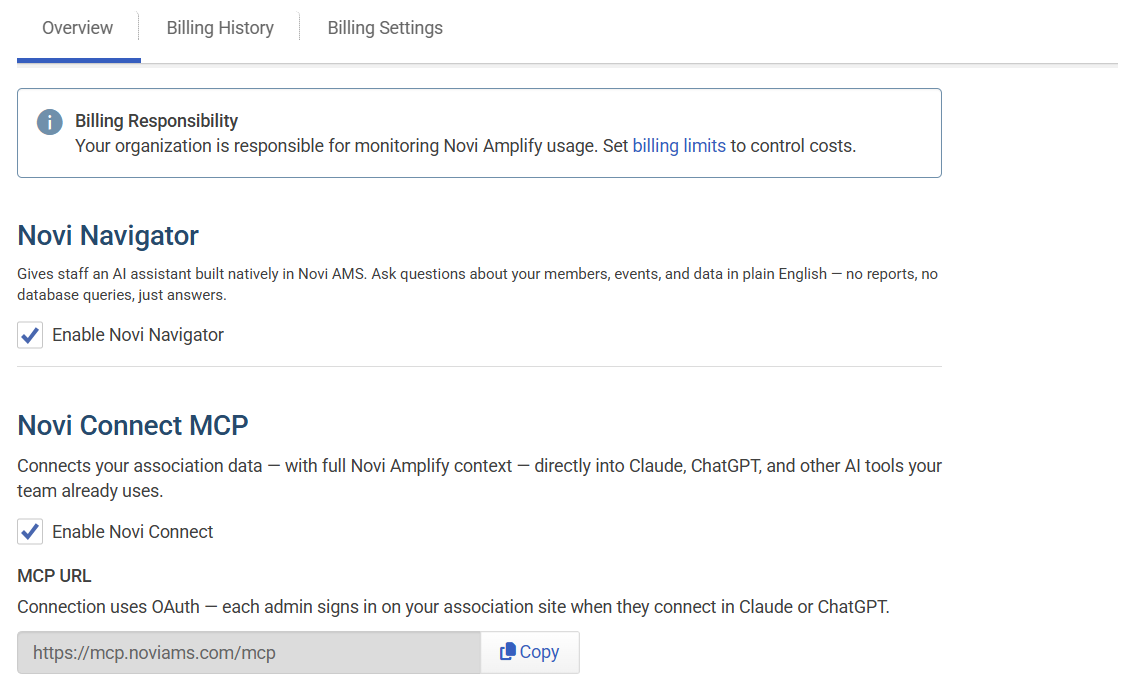
Enable Novi Connect in Novi AMS
An association admin will first need to enable the Novi Connect MCP from the back end of your Novi site. This will only need to be done one time. Once enabled, it will be accessible for all Association Admins.
Click on the Settings (gear icon) in the upper right corner and select the link to Amplify Settings
Check the Enable Novi Connect box. This registers your association with the Novi Connect server so it's ready to authenticate when you connect from your AI tool.
Copy the Novi Connect URL (https://mcp.noviams.com/mcp). You'll need it in the next step.
Manually Connect to Novi's MCP
Using an MCP connection, you can connect Novi to third-party tools that also offer an MCP connection. Four such common connectors are Claude, ChatGPT, Gemini, and Copilot Studio.
Once enabled in your Amplify Settings, you can add an MCP connection in your third-party tools using this URL: https://mcp.noviams.com/mcp. This page will ask you for your Novi website URL and will use single sign on to authenticate your settings and access.
Add to Claude
Note for Claude users: If your Claude account is on a Team or Enterprise plan, only a Claude workspace admin can add custom connectors. If you don't see this option, ask your Claude admin to add it. Once it's added, everyone on the workspace will see the connector available to connect to individually.
In Claude, go to Customize on the left side navigation panel.
Click Connectors → Add → Add custom connector.
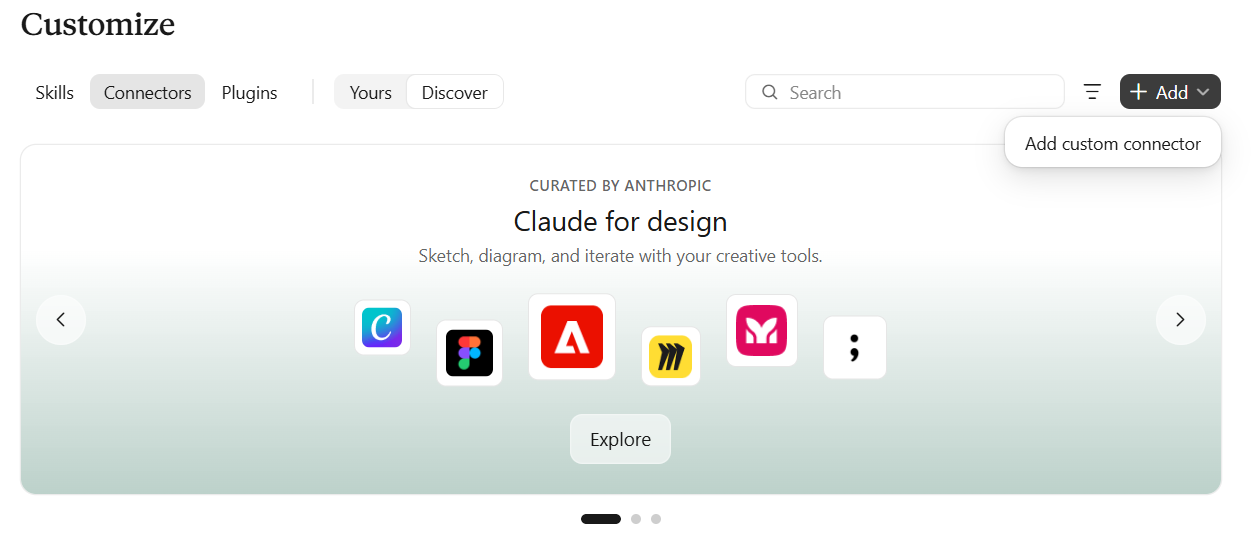
Fill out the requested information.
Name: Novi Connect
MCP Server URL: https://mcp.noviams.com/mcp
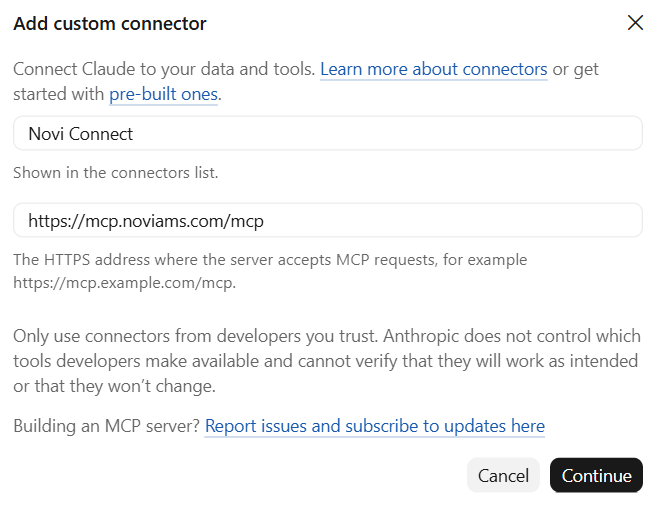
Click Continue.
On the Add custom connector page, select the following:
Authentication: Sign in now
OAuth Client: Register automatically
Then select Add.
Follow the rest of the steps starting with Step 2 under Connect Your Association's Site.
Add to ChatGPT
Note for ChatGPT users: If your ChatGPT account is on a Team or Enterprise plan, only an OpenAI workspace admin can add custom connectors for the entire organization. Once it's added personally, the admin can make it available to everyone in the workspace and everyone will see the connector available to connect to individually (see step 6).
In ChatGPT, navigate to Plugins on the left side navigation panel.
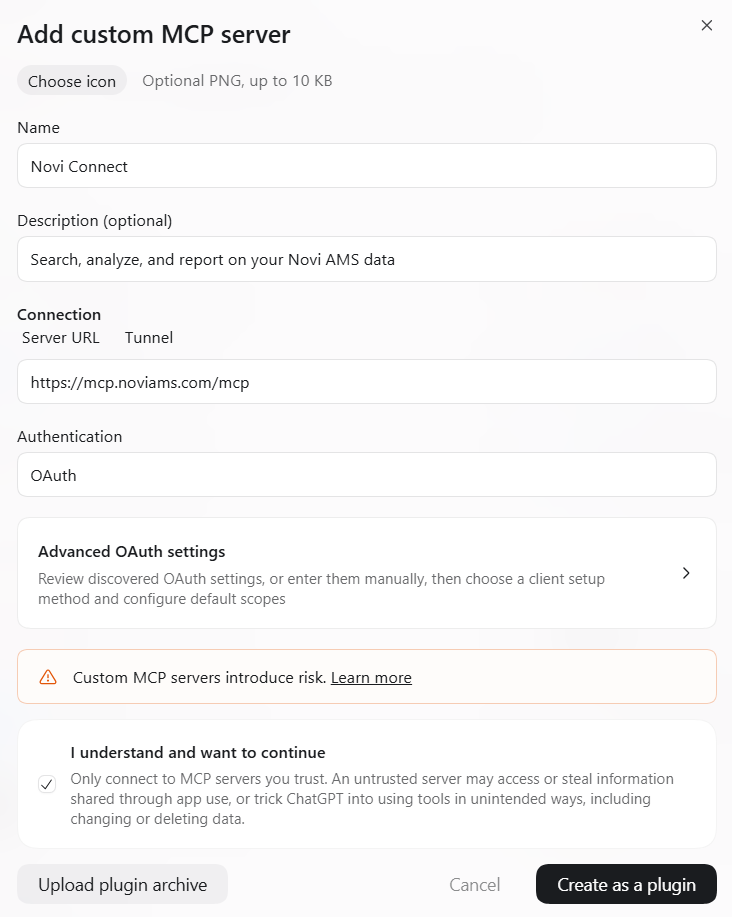
Click the Add button and select Add custom MCP server.
Fill out the requested information.
Icon:
Name: Novi Connect
Description: Search, analyze, and report on your Novi AMS data
Server URL: https://mcp.noviams.com/mcp
Authentication: OAuth
Check the "I understand and want to continue box," then select Create as plugin.
Click Continue to Novi Connect.
Follow the rest of the steps starting with Step 2 under Connect Your Association's Site.
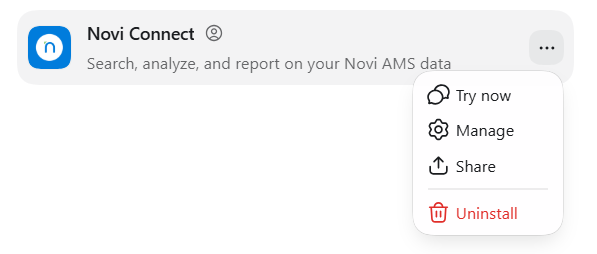
To make the connector available to your entire OpenAI organization, find the Novi Connect plugin in Plugins, click Share → Link access → and change visibility to Visible in organization directory.
Add to Gemini
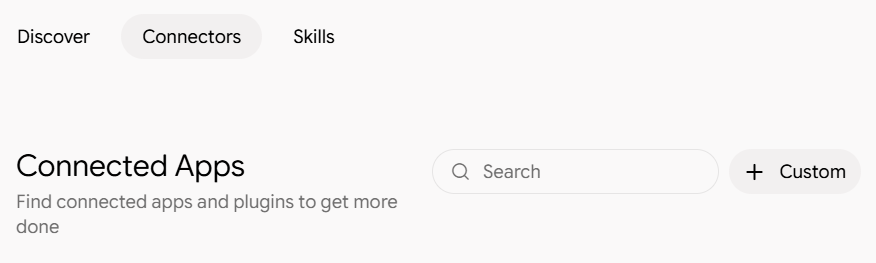
In Gemini, click Customize on the left side navigation panel.
Select Connectors and select Custom.
Add the Novi Connect server URL: https://mcp.noviams.com/mcp and select Next.
Check the "I understand and accept the security and privacy risks of connecting this custom app." after reviewing the Gemini policies.
Select Agree and continue after reviewing the Google services policies.
Follow the rest of the steps starting with Step 2 under Connect Your Association's Site.
Select Connect.
Add to Copilot
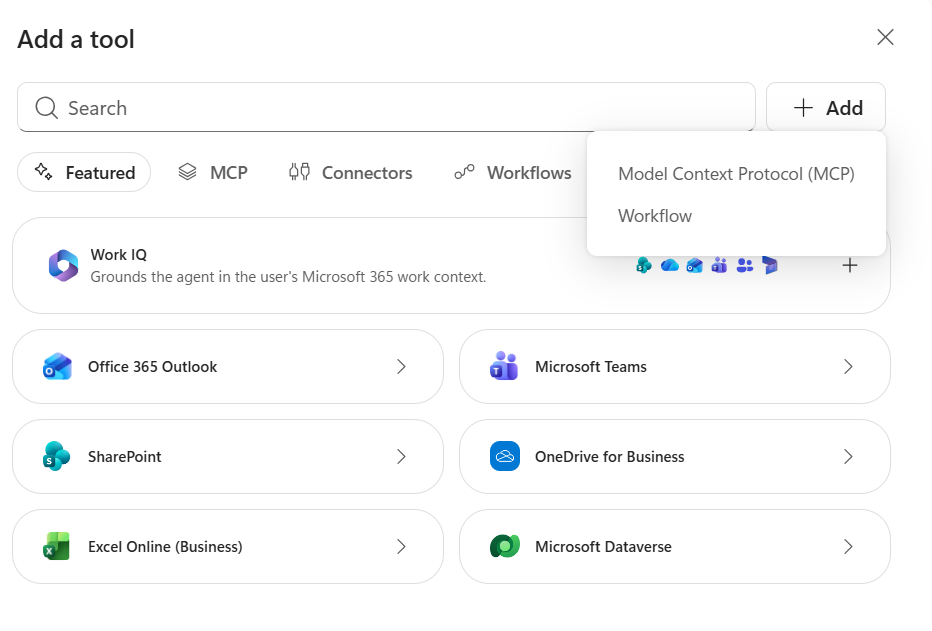
In Copilot Studio go to Agents on the left side navigation to add Novi Connect to a new or existing agent. Click Tools → Add → Model Context Protocol (MCP)
Fill in the requested information.
Icon:
Name: Novi Connect
Description: Search, analyze, and report on your Novi AMS data
Server URL: https://mcp.noviams.com/mcp
Authentication: OAuth 2.0
Configuration type: Dynamic (with discovery)
Establish the connection by clicking Not connected → Create new connection. You may leave the display name empty and simply click Create
Follow the rest of the steps starting with Step 2 under Connect Your Association's Site.
Connect to Your Association's Site
Find the Novi Connect card in your list of connectors/plugins and click connect or authenticate.
Enter your association's Novi AMS domain name, your-association.org
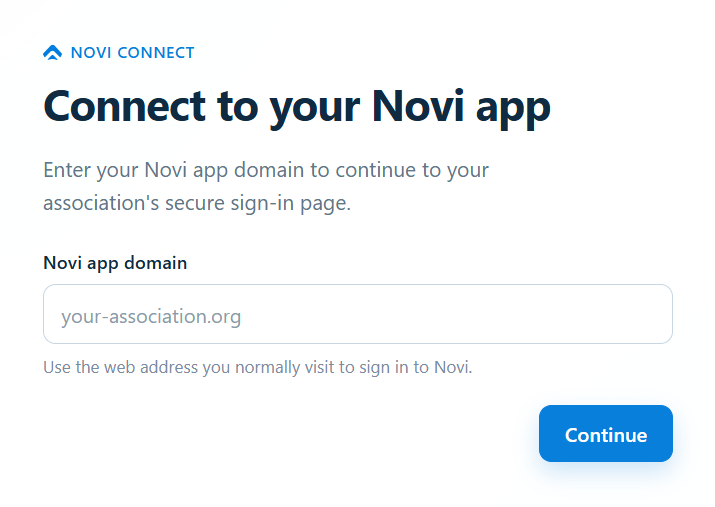
You will be redirected to your association's normal login page. Log in as you normally would (including MFA, if enabled).
When prompted to allow your selected AI tool to access to your association's data, click Allow.
You'll be redirected back to the AI tool you just connected, where Novi Connect should now show as connected.
MCP Tools Available
Novi Connect currently offers Read Only tools, meaning it cannot create, edit, or update any of your data.
These tools represent the current state and are subject to change.
Get: Retrieves the full details for one or more specific records (up to 25 at once) of a single type: member, event, membership type, committee, group, directory, or product. Includes a link to each record in Novi. Best when you already have the record ID and want the whole picture, like a member’s groups, transactions, and event history, or an event’s tickets and registrations. Contact details are only returned when asked for.
List: Returns a list of records of one type: members, events, membership types, committees, groups, directories, or products. Supports optional filters that depend on the type, such as membership status and join or expiration dates for members, or date range for events. Best for browsing or filtering a set, like “Show me everyone whose membership expires this quarter” or “Show me upcoming events.” Large lists open in an interactive table.
Resolve ID: Finds the Novi ID for a record when you only know its name. Searches by name across members, events, membership types, committees, groups, directories, products, and custom fields, and returns the best matches. Use it first when you have a name but need an ID for Get.
Query: Answers custom questions about your data in natural language. Use it for counts, analysis, and anything that combines data from more than one area, such as “How many current members do we have?” or “Which members registered for last spring’s events?”, which the simpler lookups can’t answer. Read-only, so it never changes anything in Novi. Large results open in a table you can export to CSV.
Docs search: Searches Novi’s public help documentation to answer how-to questions about Novi AMS features, settings, and workflows. Use it for “how does this work?” questions rather than questions about your own data.