How to Remove the QuickBooks “View and Pay” Button from Invoices
Last updated: September 3, 2026
Use Novi Pay links instead of QuickBooks’ “View and Pay” button. Follow these steps to remove it from PDF invoices and avoid confusion.
Using Novi Pay®? Make sure members use the Novi Pay link - not QuickBooks Payments. If a “View and Pay” button appears on PDF invoices, below are two options for how to remove it and prevent confusion.
Recommended Option: Adjust Invoice Settings in QuickBooks
Remove the button right from QuickBooks with a few quick changes. This will require you to create a "test" invoice that you will delete afterwards.
Open a new invoice in QuickBooks Online
Go to the "+ create" button in the top left corner and select Invoice

Once open, Enter a customer, Product/Service and an amount into the invoice. The rest is not important as you will be deleting it afterwards.

2. Switch to a Modern template
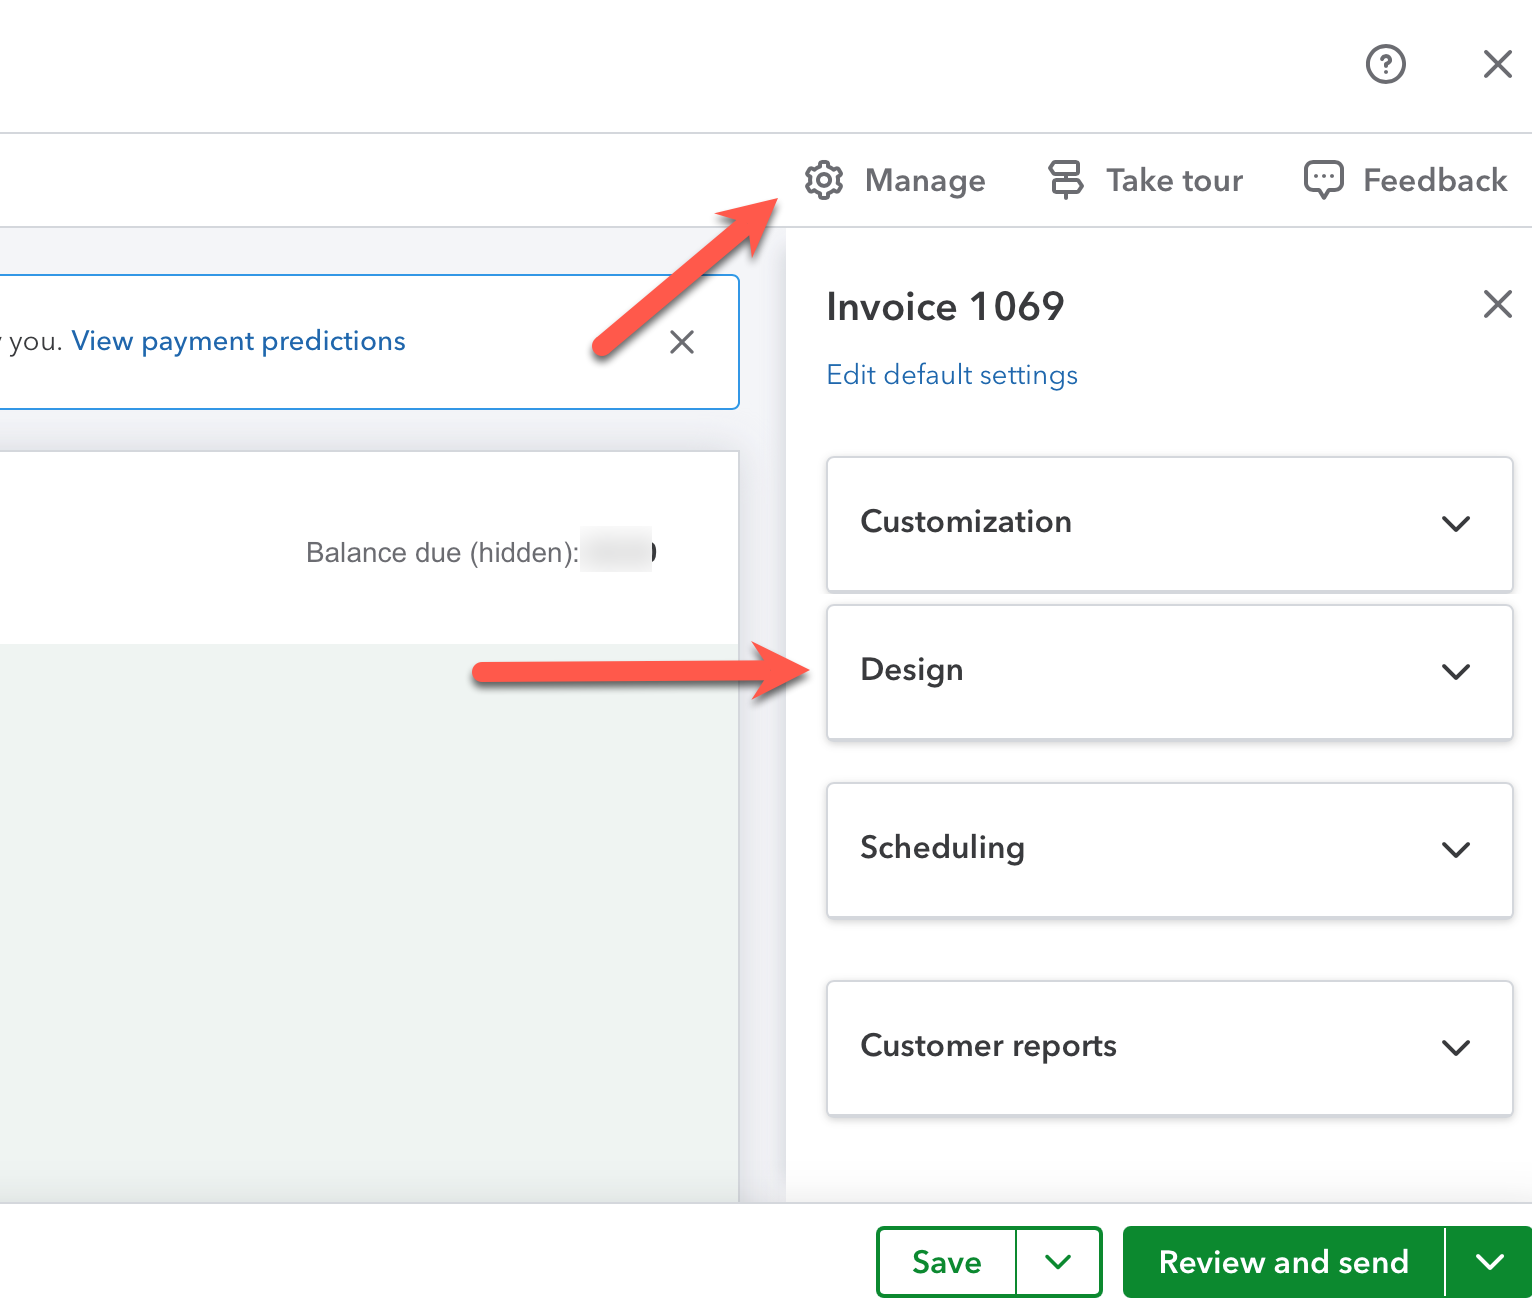
Within the invoice, click Manage (top right).
Under Design, change the invoice style to Modern.
3. Turn off the payment link
While still in Manage, scroll to Design.
Toggle off Add payment link to PDF.

4. Save the invoice
Once you save the invoice, you can then click the More Actions option near the bottom and select Delete.

✨ That’s it! For most people, doing it one time and then saving it updates the settings for future invoices.
📌 Pro Tip
Send yourself a test invoice to confirm the button is gone. ✅
Once you’ve completed the steps above, QuickBooks will no longer attach the “Pay Now” button to your invoices.
Additional Options:
Update QuickBooks Payment Settings
Another option that may be done in addition to the top instructions is to remove online payment options from your invoice delivery settings.
This is a good choice if you don’t want to use QuickBooks Payments for invoicing at all.
Click the Gear icon.
Go to Account and Settings > Sales tab.
Under Invoice Payments, uncheck the payment options.
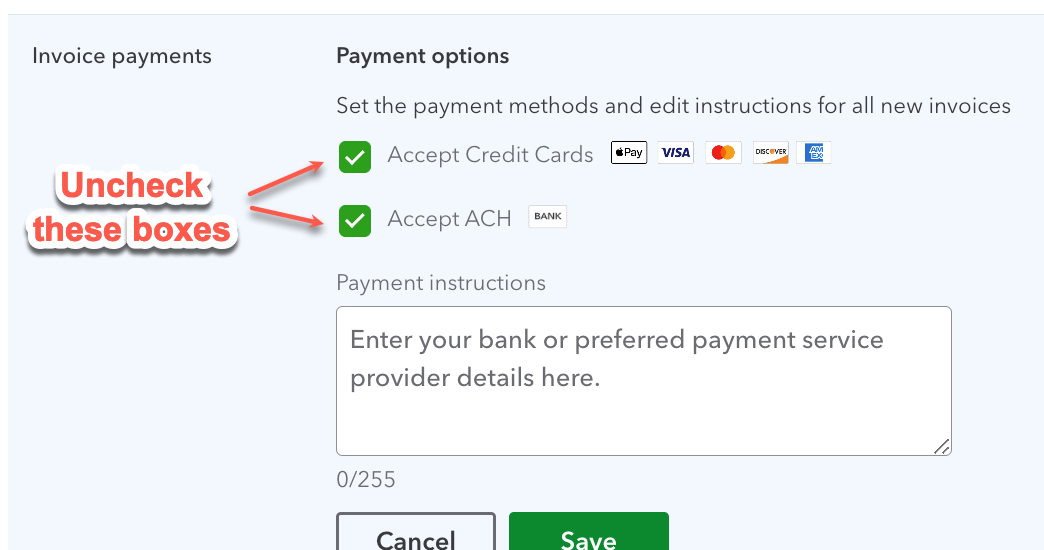
Hit Save and Done.
Cancel QuickBooks Payments Subscription
If you don't want to use QuickBooks Payments at all, the only way to remove the button complete and not allow people to be charged in any way is to cancel the QuickBooks Payments subscription itself.
Click the Gear icon.
Go to Subscriptions and billing.
Find the QuickBooks Online Payments tile.
Select Cancel Subscription.
📌 Note: This subscription may be tied to whichever individual originally set it up in QuickBooks. If you are the QBO Primary Admin, you should still be able to cancel it regardless of whose information it's tied to.
⚠️ Canceling this subscription removes QuickBooks Payments account-wide, not just from statements, so only do this if you're fully moving to Novi Pay (or another processor) for all payment collection and do not plan on sending one-off invoices through QuickBooks Online to be paid.