Activity Timeline Report
Last updated: September 3, 2026
View a list of members' activities, tasks, and credits all in one place.
The Report
The Activity Timeline Report allows admins to view and export a list of custom and system-generated activities from members' records.
Here are some search examples:
Notes by keywords and subject, such as why members did not renew.
Event registrations and manual credits all in one place.
Members who started or stopped receiving benefits from their parent company within the last month.

View the Activity Report
Go to the backend and click Reporting in the left sidebar.
Open the General Reports toggle
Select Activity Report
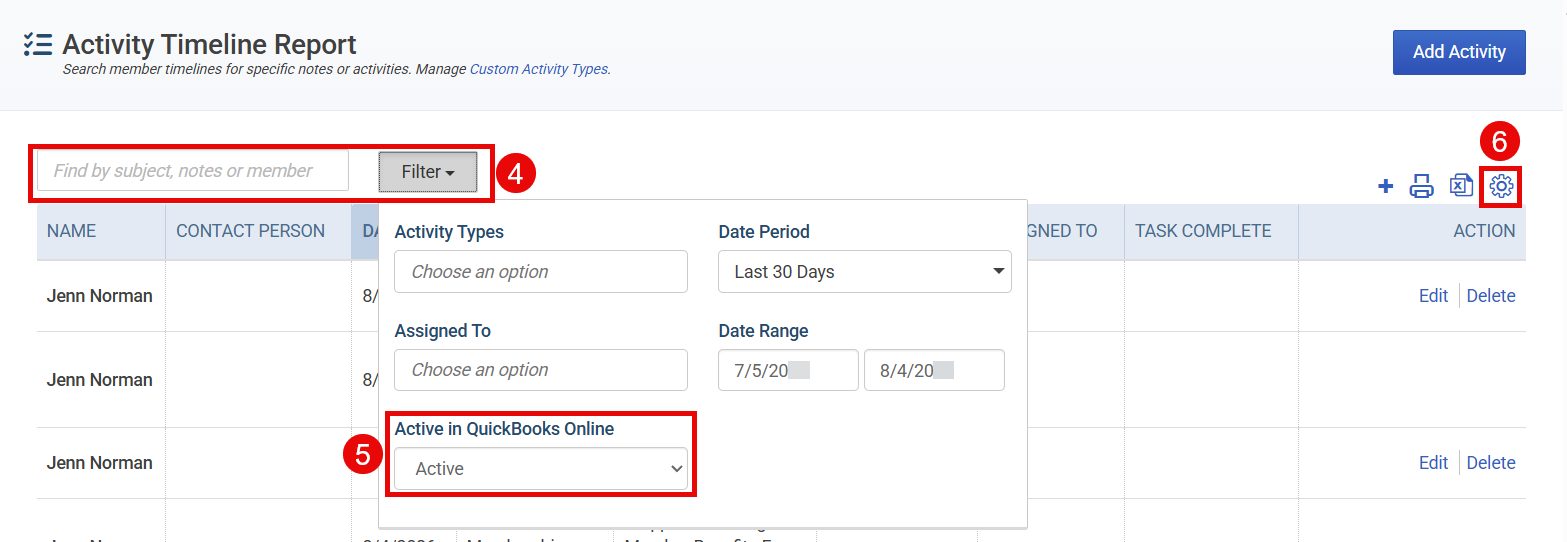
Use the Search field and Filters to narrow down the results.
When the report opens, by default the list will automatically populate all activities for Active records (i.e. not deleted) and will default to showing activities that have occurred in the last 30 days.
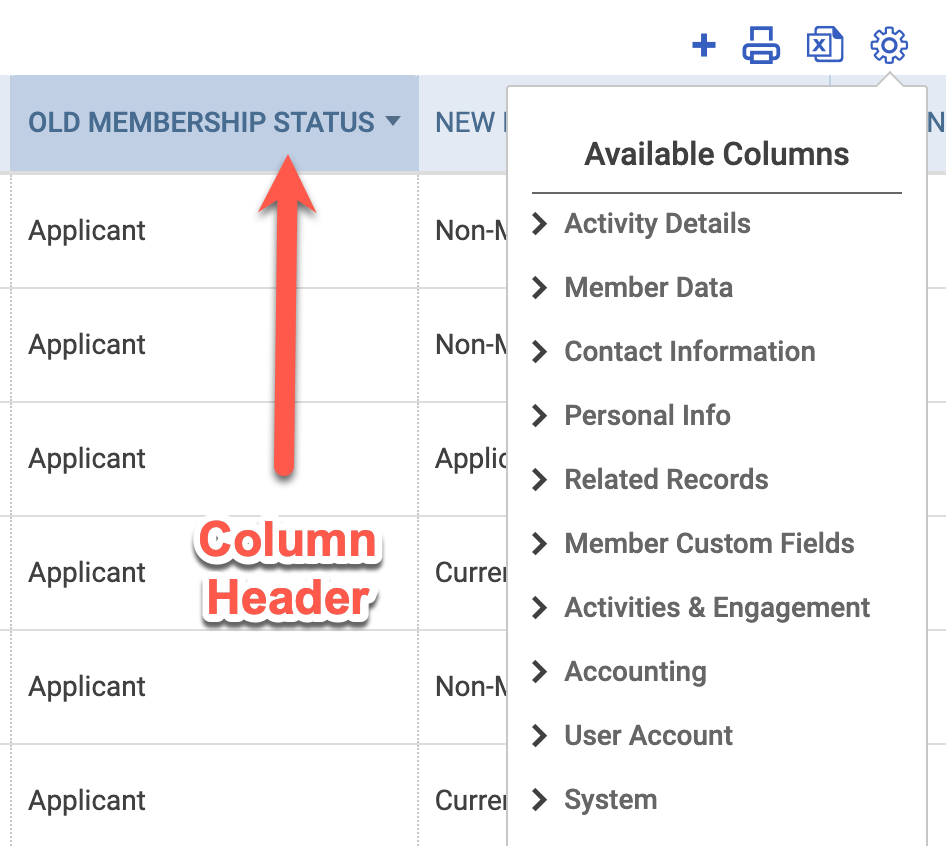
Use the gear icon to add or remove display columns from the list view and select how many rows to view per page.

Components of the Report
Search
Search the results by:
Subject
Note
Member Name
Filter
The following filters can be used to customize the report results:
Activity Types - Click in this filter to select one or more specific activity types, including custom activity types.
Assigned To - You can narrow this down by choosing one or more admins. Note: Not all activities will have Assigned To available.
Active in QuickBooks Online - The default setting shows Active records. You can also view Inactive records (i.e. deactivated or deleted) by updating this filter. Note: This is different than membership status.
Date Period - The default setting is the Last 30 Days to narrow down the results. Use the dropdown arrow to select another preset date range. Selecting All Dates will clear the Date Range fields. Note: Manually changing the dates in the Date Range From and/or To fields will automatically change the Date Period to Custom.
Date Range - The default From and To dates displayed align with the Date Period selected. Use the Date From and/or To fields to set a Custom Date Range. The Date From or To fields can be left blank.
Display Columns
Some columns show by default, while others are available under the gear icon. To sort the report by a particular column, click on a specific column header.
You can see a full list of the available columns here.
Exporting the Report
The Activity Timeline Report can be exported to a .pdf or .csv file by clicking the corresponding icon (see image below).
PDF (printer icon) - includes only the columns that are shown in the list
CSV (paper with an "x" icon) - can choose to export only columns shown in the list or all available fields

Related Articles
Activity Timeline Tracking - A guide to the Activity Timeline on member records, which includes automated entries as well as custom notes and tasks entered by admins.
Create a New Custom Activity or Task - How to add a new activity or task to appear in a member's Activity Timeline and/or your Task Center.
Using the Task Center - An overview of the backend Task Center, where admins can manage member-related tasks for themselves and other staff.
Manually Adding Credits for a Member in Novi - Learn how admins can add credits to member records without using a Novi event ticket.