Setting Up an Event Registration Pathway
Last updated: September 17, 2026
Ready to create a new event? Great! You'll want to consider which of the four Novi registration paths makes the most sense for your attendees and your event! This article covers the event registration pathways, how each one works, and when to use them.
What Are Registration Pathways?
The registration path determines which order registration steps during registration:
Do attendees select who is attending first and then choose tickets?
Do attendee choose how many tickets they need first and then assign people to each ticket?
Are admins handling registration offline only?
Will attendees be directed to a third-party platform for registration?
In any scenario, you can find your registration pathways in an Event on the Settings tab.
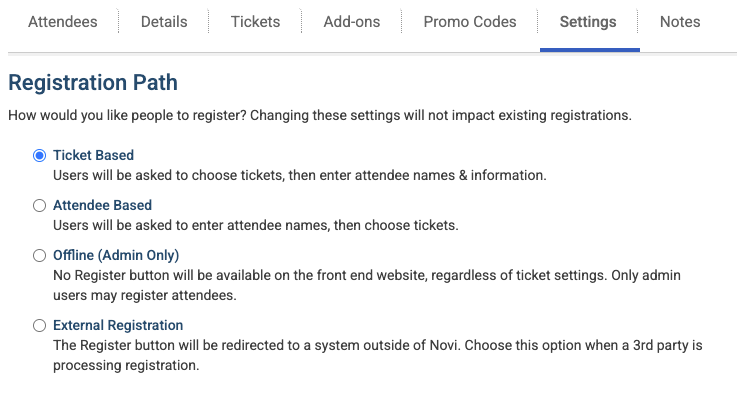
Tip: Not quite sure which pathway is right for your event? Test them out. This setting can be changed after tickets are created and changing it does not affect existing registrations.
Default Settings That Impact Pathways
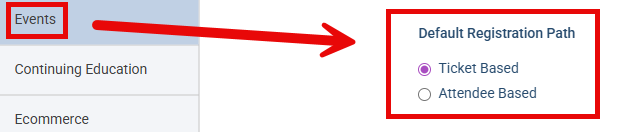
Setting a Default Pathway
You can save a default registration pathway in Association Settings to avoid resetting it for every new event. Go to Association Settings > Events to update this setting. The default pathway is Ticket Based unless you change it to Attendee Based.
Only Ticket Based and Attendee Based are available as default options, since Offline and External Registration are event-specific features.
Allowing Users to Register Other Related People
You can allow users to register other staff members within their organization. Access this setting by going to Association Settings > Events. This setting is turned on by default.

Important Note: This feature requires Enable Company Signup Protections to be enabled. This is to prevent access to private personal information by new, unapproved user accounts when registering staff for events. If you need this setting enabled, contact Novi Support and we can enable this for you.
The Four Registration Pathways
Ticket Based
When this option is selected, registrants first choose how many of each ticket they want, then add each Attendee's details to each ticket type.

Great for scenarios where...
You expect most registrants to register two or more people, and you expect each attendee to be assigned to only one or two tickets.
You are using Dynamic Ticket Pricing by Quantity, and you want to display which tickets are discounted prior to adding attendees.
Example: Simple conference or webinar with one or two ticket types applicable to each attendee.
See it in action:
Attendee Based
When this option is selected, registrants choose the attendee(s) first, then select each person's applicable tickets on separate pages specific to each attendee.
What the Member Sees

Great for scenarios where...
You expect most registered attendees to be registered for multiple ticket types or with Product Add-ons specific to each attendee.
- OR -
You expect most registrants to only register themselves, regardless of how many ticket types they'll purchase.
Example: Complex event such as a conference with a base full ticket(s) but then additional opportunities such as an optional pre-conference workshop, or special breakfasts or receptions that are not included in the overall conference fee.
See it in action:
Important Note: When your event is set up as Attendee-Based, the attendee's Name field is always required on the Attendee Form in each Ticket's settings.
For the Attendee Based Registration Pathway, you can also select Require Unique Email Per Attendee on the event's Settings tab. This prevents multiple registrations with the same email address within the same ticket type.
Offline (Admin Only)
When this option is selected, the registration button will not show on the frontend. Only admins will be able to register people for the event.
Great for scenarios where...
You are hosting a small, private event for a select group of attendees.
You are planning an event where you are inviting dignitaries or legislative representatives and want to provide a concierge experience.
Example: You are hosting a strategic planning session for your Board and invited Chapter leaders.
External Registration
When this option is selected, the registration button on your event page links out to a URL you specify, rather than launching the Novi event registration flow.
Great for scenarios where...
You have an event set up in Novi that is showing in the frontend Events calendar and list view, but also has additional information on another webpage or third-party platform.
Your event is set up in Novi and showing in the frontend Events calendar and list view, but registrations are being collected on a different site or by a third-party.
You want to share an event for a chapter or other affiliated partner on your calendar but they handle their own registrations.
Example: You are co-sponsoring a legislative day as part of a coalition and you are jointly promoting the event but a third-party is going to handle the registrations.
Important Note: The field you will place the URL in will not show until you select the External Registration pathway.
Customizing Instructional Text on Registration Pages
For Attendee Based or Ticket Based registration, you can add customized text to provide users with information or instructions needed on the registration pages.
To add or edit this content, go to your event > Settings tab > Registration Options section. Here you'll find the two sections to customize the content at the top of the attendee step and the ticket(s) step during registration.
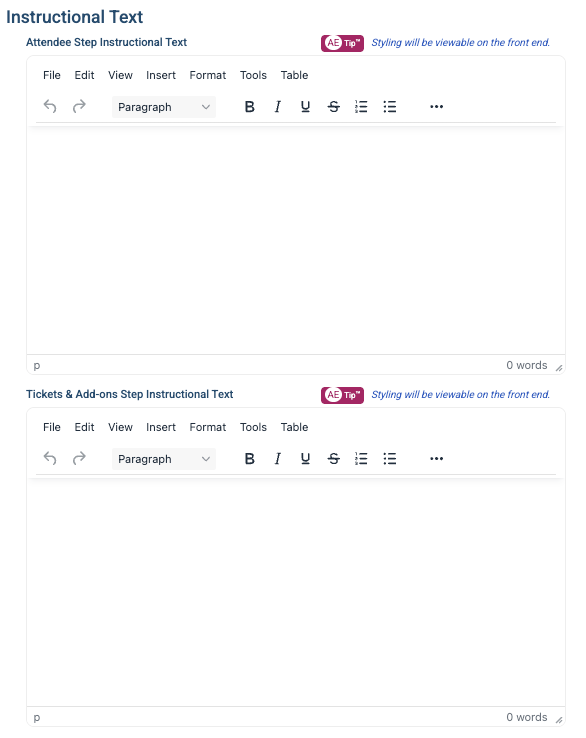
You can also edit this content directly on the frontend event page! Navigate to your event, click to register, and once you get to the different steps in the process, you'll see the editable content regions at the top of the page.
Here's an example of where these appear in attendee-based registration:
Attendee Page:
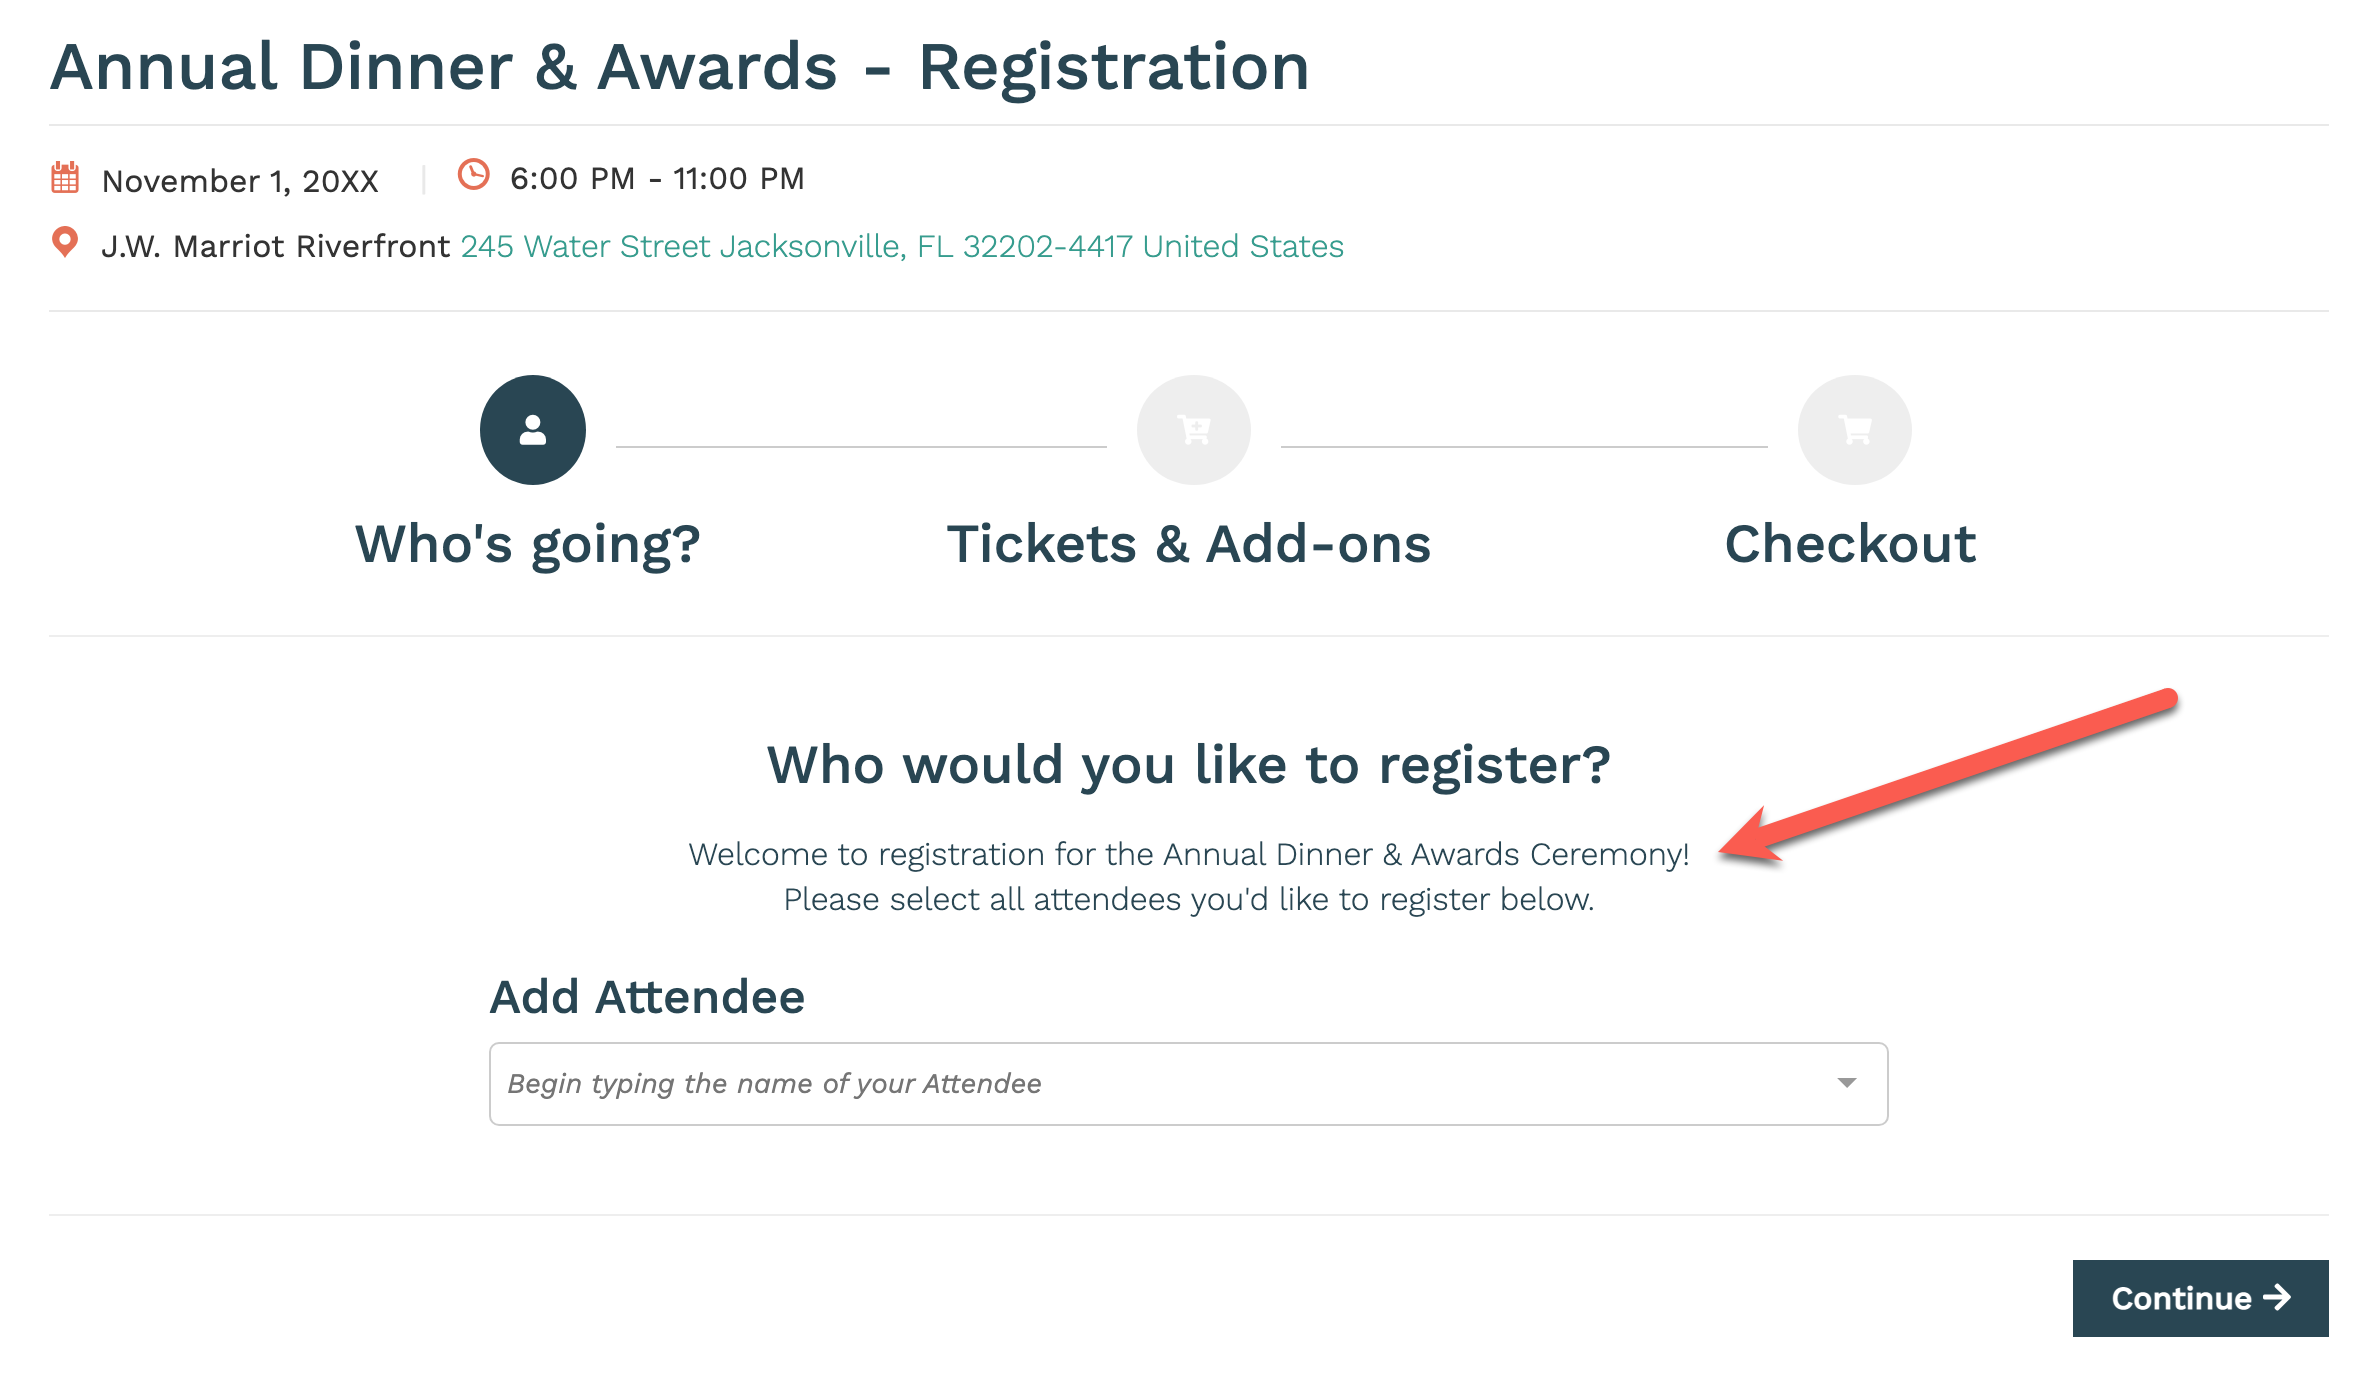
Ticket Page(s):
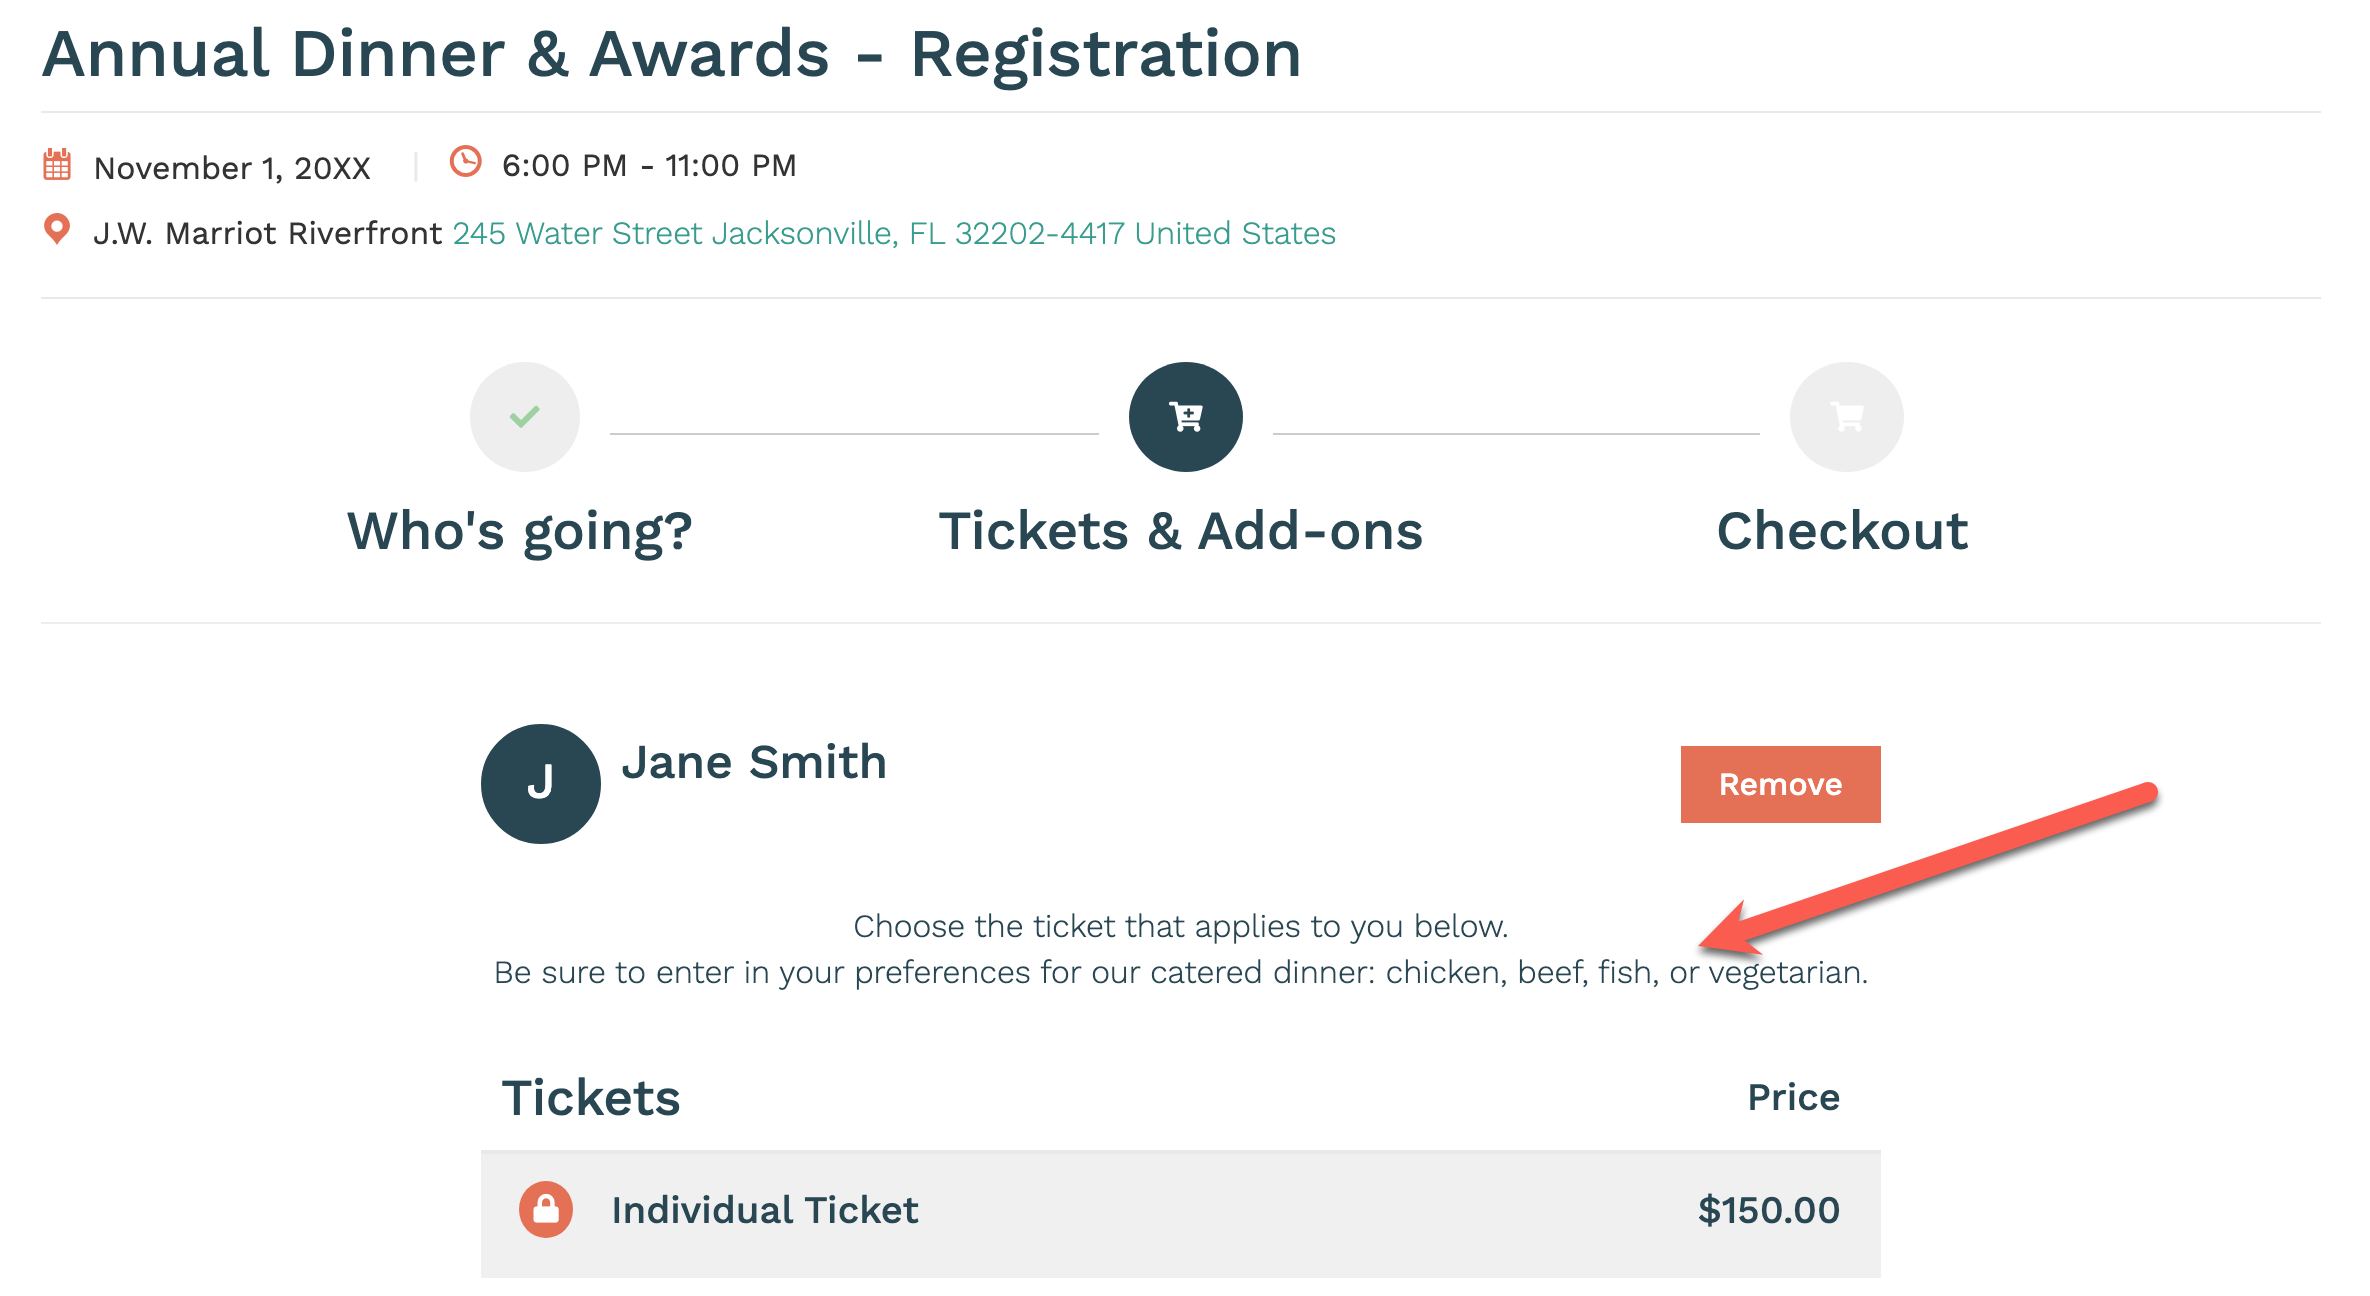
Tip: Try not to make the content too long, so that the registration steps on the page don't get lost!
Additional Considerations for Attendee Based and Ticket Based Registration Paths:
Your choice in Registration Paths does not affect what collected registrations look like for you (admins) on the backend.
The checkout is the same with Attendee Based and Ticket Based paths - both allow you to click on the name of an attendee to edit their information before checking out.
While our scenarios are recommendations, keep in mind that either setting (Attendee Based or Ticket Based) will offer all the same event and ticket features, it's truly about the registration workflow that makes the most sense for your event and members.
Related Articles
Keywords: event registration paths, registration pathway, ticket based, attendee based, offline registration, external registration, registration workflow, association settings events, event setup